 Backyard plum trees often produce more plums than their owners can use. Here are 4 simple methods of preserving plums that I use to get the most from my plum harvest!
We have a blood plum tree in our backyard that provides us with delicious plums each summer. It is not a huge tree but it can hold lots of fruit. This year we have had a particularly good plum harvest. The plums are nice and big thanks to some good spring rains we had last year!
Even though we love eating plums and I love baking with plums, most years we have more plums than we can use. We do give some away to family and friends but there is still usually lots left over.
I don’t like to see them go to waste or for the birds to get them all, so we try to preserve as many as we can. That way we can use them for months to come and if we preserve enough – all year round! This year we will preserve around 8kg of plums using various methods.
I use 4 different methods to preserve our plums and I thought I would share them with you.
Method 1 – Preserving Plums by Freezing
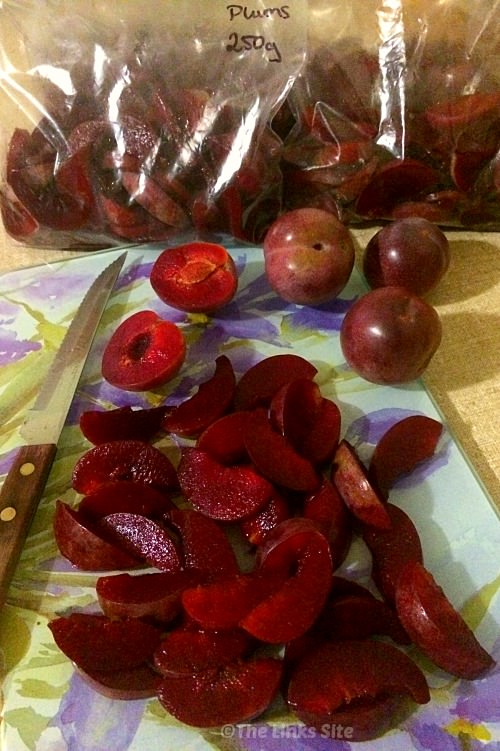
In my opinion the easiest way to preserve plums is to freeze them. I usually cut up 4 or 5 kilos of plums each year to freeze. The method is very simple:
- Wash and dry the plums
- Chop the plums in half and remove the seed and any bad spots
- Cut the plums into slices
- Weigh the plums out into zip lock bags (I put 250g or around 8 ounces in each bag)
- Seal the bags well and freeze
- To make stacking easier I put them all into a large airtight container that fits into my freezer

I use the frozen plums all year round in baking. When I want to use them I will put the bag of plums into a bowl of warm water to speed up the thawing process. Then I can just mix them into my recipe. Even if they’re not fully thawed out they seem to still cook fine.
Method 2 – Preserving Plums by Dehydrating Them
I am quite new to dehydrating food as I have only started using a dehydrator this year. That being said I can see that my dehydrator will get quite a bit of use during plum season! I have preserved just over a kilo of plums this year in the dehydrator and I hope to do even more next summer.
Preparing the plums to be dehydrated takes similar time to freezing them. You just have to be aware that the thicker you cut the plums up the longer it will take to dehydrate them.
If you cut the plums into roughly 1cm thick slices it will take about 12 – 14 hours to dehydrate them. The first time I dehydrated plums I cut them up very thin (about 0.5cm thick) and they were ready in 6 to 8 hours. Personally I would prefer to slice them up thicker as preparation is quicker and you can get more into the dehydrator!
To dehydrate plums:
- Wash and dry the plums
- Chop the plums in half and remove the seed and any bad spots
- Cut the plums into slices (I prefer about 1cm thick)
- Set the dehydrator to 60 °C (140 °F)
- Arrange the slices in a single layer in the dehydrator
- Allow to dry for 12 to 14 hours
- Plums are ready when they are chewy and no longer plump
- Place the dried plums into an airtight container
I have learnt that you should give the container a shake every day during the first week after dehydrating. If you see any moisture in the container then you need to put them back into the dehydrator for a bit longer.
I’m looking forward to snacking on these in the coming months and also using them in baking.
Method 3 Preserving Plums by Making Plum Jam
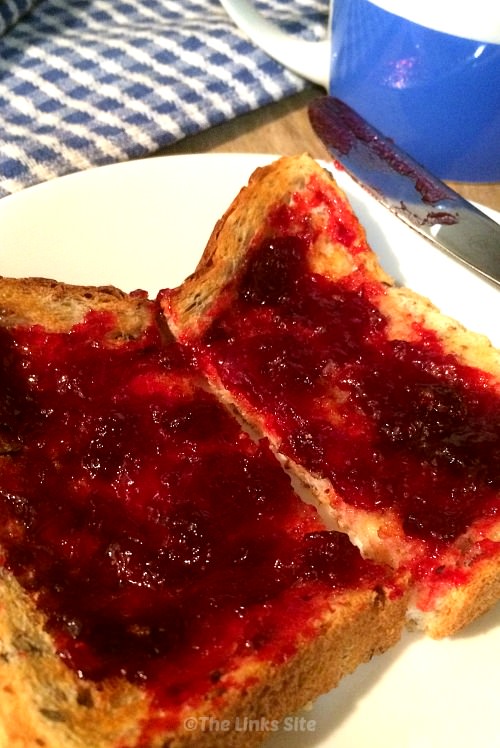
When I was a kid my mother used to make lots of plum jam. But I don’t eat a lot of jam so it is not always top of mind for me. This year though I thought I’d have a go at making a small batch of plum jam and I am glad I did! If you’re like me and only want a small amount of jam, check out this recipe because it only makes a couple of jars.

Method 4 – Preserving Plums by Using Them in a Recipe That Freezes Well
Baking with plums is probably my favourite way to use up plums! I know that it is more about using the plums than preserving them. But I still wanted to include it in this list because it preserves the taste of plums for weeks after the tree is empty!
My favourite freezer friendly plum recipe is this one for Plum Oat Muffins. I make them with fresh plums in the summer and then pop them in the freezer. It’s great to be able to enjoy these plum delights well into autumn. When they are all gone I make them with frozen plums throughout the rest of the year!

Actually most of the plum bakes that I put into the freezer don’t last too long. I quite like a sweet breakfast treat so a muffin or small piece of cake is very popular. It is so handy to be able to just lift out and reheat some when you need a snack or dessert in a hurry too!


I wish that someone would preserve a tangy tart plum marmalade and sell online.
Oh yes Mel, a tangy plum marmalade sounds wonderful!
You know, I freeze A LOT of fruit and the best method I’ve found is cutting them in to pieces, freezing them on a tray with parchment until they’re completely frozen. Then I vacuum seal them. They defrost faster when needed but because they’re smaller I usually don’t need too. For muffins I cut the slices them in half, toss them in some flour and they go right into the batter. Some I don’t even vacuum seal, I just put them in a gallon freezer bag for smoothies and whatnot. I also do this with all my berries. It just makes them really convenient to use. ❤️
Hi Erinn, I have never though of vacuum sealing them! I usually just cut them up, put them in a bag, and freeze them as is. They take a little while to defrost but not too long. I do have a vacuum sealer that I don’t use very often. I’ll have to give it a try.