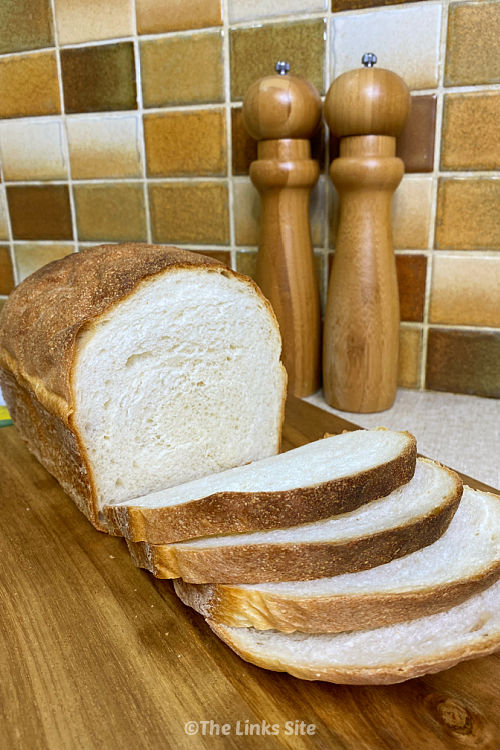
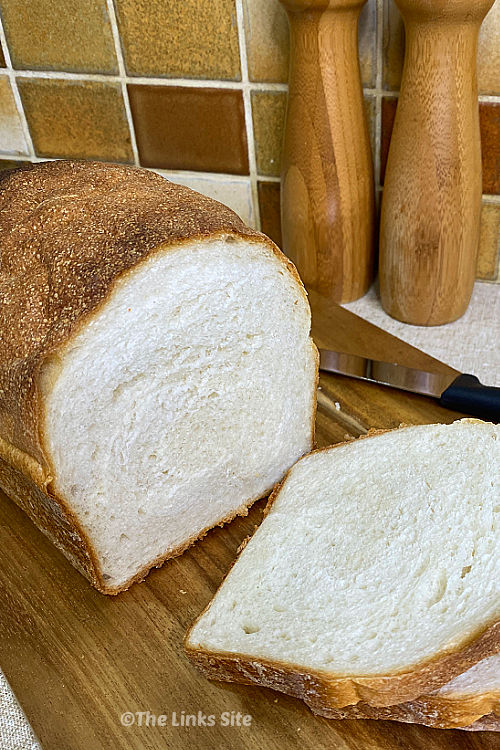
You just can’t beat freshly baked homemade bread. This easy bread recipe is great for beginners and experienced bakers alike. It only requires 6 ingredients, and you can adapt it to make a variety of loaves!
I shared this recipe over nine years ago, so I think it’s about time I update it! When I first published this recipe, I was only making bread on and off. More recently though I have stopped buying bread and I use this recipe to make my own.
That’s because everyone in my family prefers homemade bread over the store-bought stuff! For some reason it just seems to have more flavour. Not to mention the delicious aroma that fills the house when there is a loaf of bread in the oven! And the convenience of being able to whip up a loaf of bread whenever I need it. Fresh baked bread on Christmas Day is so good!
Another thing I love about this homemade bread is that it freezes well. We don’t eat bread every day, so it is handy to be able to make up a loaf and put some of it in the freezer.
Gradually, over the years I have made small tweaks to the recipe. No major changes, just small adjustments which I would now like to share. Along with a few hints and tips!
Changes I’ve Made to the Recipe
The first adjustment I have made is that I no longer include bread improver in the ingredients. When I was new to bread making, I thought that adding bread improver was beneficial. As I’ve become more experienced, I don’t find that adding bread improver makes much difference. I’m not sure it ever did make any difference, so I leave it out.
Another adjustment that I have made to this recipe is that I don’t use the dough hooks on my mixer to knead the dough. If you want to use dough hooks, you still could but I generally like to knead my dough by hand.
Homemade Bread in a Bread Machine
While I have used this recipe for years to make bread completely by hand. I’m also pleased to say that it works great as a bread machine recipe.
I bought a cheap ($70) bread machine from Kmart last year and it has been great. Initially I used the bread machine to mix and bake the bread, but I didn’t really like the shape of the loaf. Now when I use the bread machine, I use the dough setting, and then cook the bread in a loaf tin. This is great when you want a standard size loaf of bread, but you want to give your arms a rest from all the kneading!
The printable recipe at the end will include instructions for how to make this bread completely by hand. But you can also use the ingredients in a bread machine. Just make sure to add them in the order that your bread machine specifies.
I set my machine to a 650g loaf as this is about the size of the loaf that I get.
One tip I have for using this recipe in a bread machine is to check the dough after it has been kneading for 5 minutes. If it looks dry and the flour is slow to incorporate – add up to a teaspoon of extra water. If it looks a bit too wet and sloppy – add half a tablespoon more flour.
Using Different Types of Flour
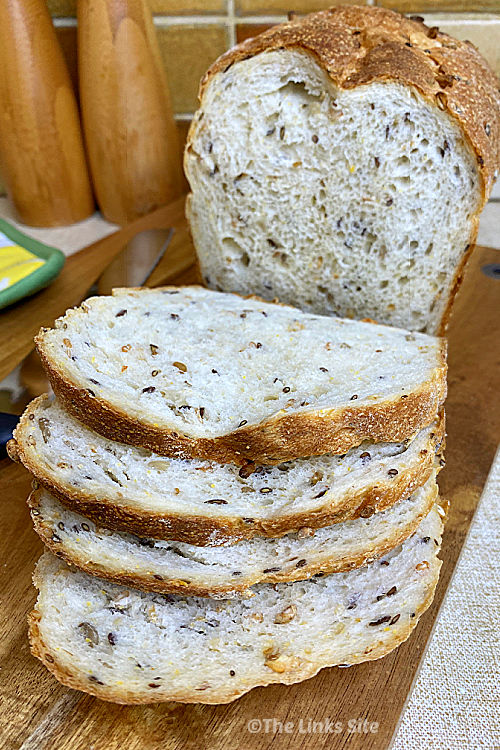
Most of the time I make multigrain bread with this recipe, but white bread flour works just as well. One tip I have for the use of multi grain flour is to use a blend of multigrain and white flour. When I first started making bread, I found using only multigrain flour resulted in a dense, poorly risen loaf.
With practice I’ve found that mixing in some white flour helps to lighten the dough, so it rises better. These days I use 75% multigrain flour and 25% white flour.
Making Different Loaves of Homemade Bread
This recipe is great for making a traditional sandwich style loaf. But it can also be used to make bread of other shapes and sizes.
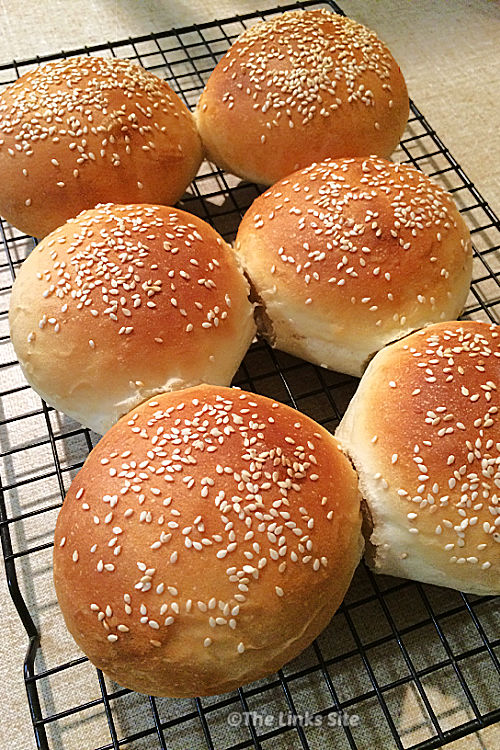
Instead of using a loaf tin, shape the dough into a ball and make a delicious cob style loaf. Or divide the dough into smaller balls to make bread rolls or even dinner rolls.
You can even add some flavour to your bread. I make a tasty herb and garlic pull apart bread with a recipe very similar to this one!
Final Bread Making Thoughts
Making bread can be a bit finicky even with a good recipe. But it does get easier with practice. When I first started making bread, I would get frustrated because it didn’t always turn out. Even when I thought I’d done everything exactly right.
One thing I do to minimise errors is to use precise measurements. I use a set of kitchen scales to weigh out my flour and my water. And I have invested in a set of proper measuring spoons to ensure my yeast/sugar/salt etc are measured out the same every time.
I hope that I have inspired you to have a go at making your own bread. Or trying again to make bread! And I hope that you enjoy making and eating this bread as much as I do.
Print
Simple Homemade Bread Recipe
- Prep Time: 2 hours
- Cook Time: 30 mins
- Total Time: 2 hours 30 mins
Description
This easy bread recipe is great for beginners and experienced bakers alike. It only requires 6 ingredients, and you can adapt it to make a variety of loaves!
Ingredients
1 cup plus 1 tablespoon of slightly warm water (270ml or 270g)
1/2 tablespoon of instant dried yeast
1/2 tablespoon of sugar
1/2 tablespoon of olive oil
2 3/4 cups of white bread flour (420g)
1 teaspoon of salt
extra flour for kneading etc
extra olive oil for greasing
Instructions
- Combine water, yeast, and sugar in a large bowl and stir to combine.
- Cover bowl with a tea towel and allow to stand in a warm place for 10 to 15 minutes or until the mixture is foaming/bubbly in appearance.
- Add olive oil, flour, and salt and mix with a wooden spoon.
- Turn dough out onto a floured work surface and knead for 10 minutes. Use small amounts of extra flour if the dough is too sticky. Similarly add a few drops of water to the dough if it seems too dry. *
- Once you have finished kneading, shape the dough into a ball.
- Pour a small amount (1 -2 teaspoons) of olive oil into a large bowl and then roll the dough around in the oil to coat it.
- Leave the dough in the bowl and cover with cling film.
- Allow the dough to sit in a warm place until it doubles in size (this could take anything from 30 minutes to 1 hour depending on the temperature of your home).
- Once the dough has doubled in size, tip it out onto a lightly flour surface. Now lightly knead the dough for a minute or two to degas it and then shape it into a small log**.
- Grease and flour a 24 cm (9½ in) loaf tin, then place the dough into the tin and leave to double in size again.
- To ensure the dough doesn’t dry out place loaf tin containing dough into a large plastic bag and seal the end of the bag with a clothes peg.
- Preheat oven to 220°C (430°F).
- Once the dough has doubled in size (it should fill the tin to the top), remove the tin from the plastic bag and bake for 30 minutes.
- After 30 minutes, remove from oven and transfer the loaf to a wire rack. A hollow sound when tapping the bottom of the loaf indicates that the bread is fully cooked. If the loaf doesn’t sound hollow when tapped place it back into the oven, directly onto the oven rack, for a further 5 minutes.
Notes
* I find that it is better to be a bit too wet than too dry. As long as you can knead it without it sticking to your fingers too much. If you’re having trouble kneading, because you have to keep scraping the dough off your fingers, I would add a little more flour.
** This amount of dough makes a nice 650g loaf of bread in a standard loaf tin. But you can also make a cob shape loaf or even divide the dough into about 4 – 6 smaller pieces to make bread rolls.
Extra Bread Machine notes: The ingredients in this recipe can be used in a bread machine. Just make sure to add them in the order that your bread machine specifies. I set my machine to a 650g loaf as this is about the size of the loaf that I get.
If using a bread machine, check the dough after it has been kneading for 5 minutes. If it looks dry and the flour is slow to incorporate – add up to a teaspoon of extra water. If it looks a bit too wet and sloppy – add half a tablespoon more flour. The bread can be cooked in the bread machine or use the dough setting and transfer to a loaf tin and continue with recipe from Step 9.
This recipe was first published on 7 March 2013. The post has been updated and republished on 13 June 2022.

Thank you! This is my first time successfully baking a soft flavorful loaf of bread. I added poppy seed and rosemary on a whim and the aroma and taste is out of this world. Thank you for a simple and functional recipe.
Great to hear that you enjoyed it Andy! I don’t use any other recipe these days, like you, I just use this recipe as a base and add in some extra flavours! Thanks for the feedback!
Used your recipe today and the bread was perfect. I have tried many other recipes from the internet and they have all been rubbish.
Many thanks for the perfect loaf.
Thanks for the feedback Nigel, I’m so glad you had success with this recipe. It’s the only bread recipe that I use these days!
Hi Kayleen,
Just came across your website and recipe for white bread. I am in the process of making it now, using the knead function on my Kmart breadmaker. I have followed it to the letter.
Just wondering, your recipe does not include powdered milk. I’m new to this and a lot of the recipes add milk powder. In your opinion is there any advantage to it. I have made a few different recipes, but can’t say I’m really happy with the crumb. It is too open. Your photo looked just like what I am after. Also even though I slice it and freeze it, it seems a bit course. Any suggestions would be appreciated.
Hi Dawn, I’ve got a Kmart breadmaker too! I regularly use the dough setting to do all the hard work and then bake my bread in the oven. For such a cheap breadmaker it is a very handy gadget! I have never used powdered milk in my breadmaking. Too be honest, once I found and perfected this recipe I haven’t devidated far from it. I have mostly tinkered with the type of flour, shape of the loaves, and extra flavourings etc. From what I have read, the addition of milk powder can help make the bread soft and fluffy. I think that the sugar that I used in this recipe would also have a similar effect. The yeast eats up the sugar which produces carbon dioxide which helps to make the bread fluffy. The addition of sugar also makes the bread lighter and softer. I find that the amount of sugar in this recipe is just enough to improve the loaf without adding any sweetness.
I also find that it is better to have your dough slighly wet rather than dry. I always get a better rise with a softer, slightly sticky dough.
I hope you find this helpful Dawn and I hope you enjoy your loaf of bread, I’d love to hear what you thought of it!
Hi im currently making the recipe now just curious on what yeast you used for the recipe as it doesn’t say what type of yeast it is.
Hi Melinda, I use instant dried yeast for my bread. Sorry for leaving the specific type out, I will update the recipe.